
Oh my gosh. Zulily strikes again! I have to say I have a love/hate relationship with the Z. The timed events often have 2 effects on me:
1. Buy now, under pressure, because you only have hours left (and then suffer buyers' remorse)
or
2. Suffer analysis paralysis and don't buy because there's so much awesomeness to choose from (and then fret when it sells out).
But sometimes it's option 3: Buy something awesome at a great price and then dance with glee. (Like when I got this amazing diaper bag + the stroller to match for a fraction of the retail price)!
Which will it be if I go crazy for this event?! Here are just a FEW things I'd LOVE.


1. Buy now, under pressure, because you only have hours left (and then suffer buyers' remorse)
or
2. Suffer analysis paralysis and don't buy because there's so much awesomeness to choose from (and then fret when it sells out).
 |
| Timi and Leslie Diaper Bag |
But sometimes it's option 3: Buy something awesome at a great price and then dance with glee. (Like when I got this amazing diaper bag + the stroller to match for a fraction of the retail price)!
Which will it be if I go crazy for this event?! Here are just a FEW things I'd LOVE.

Bianca White Pedestal Plate and Dome (only $22.99!)

Collapsible Cupcake Holder. I happen to know someone who has this and it's awesome!

Ferris Wheel Cupcake holder. You have NO idea how badly I want to buy this for Nadia's party! Physically Restraining Myself.
Husband, Mom, Mother in law, Step Mom (anyone who loves me)- if you read this, you may want to throw any of these items in your cart and surprise me with it. ;)
Ok, what have you snagged from Zulily? And more importantly should I buy the ferris wheel cupcake holder?!
Head over now to see these and other fabulous goodies!
I'm continuing to plan, craft, research, and basically drive myself bananas (in a good way- if there is such a thing) planning Nadia's party. I recently finished this cute, simple, and cheap DIY:

It was so easy and they are so adorable that I'd like to make 50 of them. But I won't. Not today anyway. The possibilities for these cuties are so endless that I will definitely make more (in white so that I can use them with any party color scheme) in the future! Wanna make some? Here's how!


Recently this little lovely turned one.....

One of the very first things I knew I wanted to do was make sure that there was plenty to entertain the kids. I also know firsthand from my own experience at little kid's birthday parties that as a parent, you usually spend most of the time chasing your own kids around, while not really being able to relax, eat and socialize with the other adults. It's just how it works! I really wanted to see if there was an alternative to that however, so I ended up making my best party move potentially EVER and hiring two of the most amazing teenagers that we know through a family at work. These kids ROCKED. They were the best party entertainers ever, and delighted the kids with everything from balloon animals to face painting to active games and more. I had set up the children's area in a big grassy area on the bottom of the decks where the adults would be, so parents were able to still see the kids and what they were doing, while still being able to socialize.


Yes, I'm obviously biased. However, this little sunshine party, full of cheery yellows and spiked with accents of hot pink, would be great for any little one! I was inspired initially by this lovely spread over at the Hostess Blog, and then took it in a few of my own directions.
One of the very first things I knew I wanted to do was make sure that there was plenty to entertain the kids. I also know firsthand from my own experience at little kid's birthday parties that as a parent, you usually spend most of the time chasing your own kids around, while not really being able to relax, eat and socialize with the other adults. It's just how it works! I really wanted to see if there was an alternative to that however, so I ended up making my best party move potentially EVER and hiring two of the most amazing teenagers that we know through a family at work. These kids ROCKED. They were the best party entertainers ever, and delighted the kids with everything from balloon animals to face painting to active games and more. I had set up the children's area in a big grassy area on the bottom of the decks where the adults would be, so parents were able to still see the kids and what they were doing, while still being able to socialize.

Kids favors were a variety of kid toys/treats, such as coloring books, crayons, twirly straws, punching balloons, etc., in bright beach pails that I found in the dollar section at Target.
Of course the grown-ups weren't forgotten. For adults, I feel there's really no better entertainment than good food. Especially when guys are involved, I am a big believer that although decor is definitely crucial, having a solid menu with great food is almost even more important! To follow the light-hearted and summery theme, I decided on doing pulled pork sandwiches, along with corn on the cob, honey cornbread, potato salad, cole slaw and chips. Let's just say that 20 pounds of pork and 40 satisfied adults later, I was pretty sure the menu was a hit. Sorry for the lack of pictures, but basically all hands were either working or eating... no time for the camera!

I love being creative with the drink stations at parties, and what better end of summer treat than lemonade? A Lemonade Bar set up with 4 different simple syrups (strawberry, blueberry, lavender and basil), fresh berries and fresh herbs was one of my favorite parts of the party.

It is usually guaranteed that at a first birthday party some of your guests will still be the kind not yet on solid foods. Since our party had 8 little ones under the age of 1, I set up a Baby Snack Bar with an assortment of puffs, yogurt melts and dried fruit.

And oh, the Dessert Table.... Amy Atlas I am nowhere near, but I can aspire. I was very luckily able to borrow some amazing cake plates from my mom, sister and friends, which really made the whole tablescape. One of my favorite parts were the too-cute-for-words individual banana puddings in tiny ball jars, complete with a dollop of meringue on top. Let's just say I hope they tasted good, because they were gone in minutes so I never tried one! :)


And of course you can't forget the crucial play list.... putting together a soundtrack for your soiree can set the tone and mood for all the guests, so don't overlook this detail. Sunshine songs were so much fun to put together and added a lighthearted mood to the beautifully sunny day.

All in all, it was a delight celebrating our little girl, who truly IS the sunshine of our lives... isn't it obvious??


Batter:
 1 Package (18 ¼ ounces) chocolate cake mix
1 ¼ c water*
1/2 c peanut butter
1/3 c canola oil
3 eggs
24 miniature peanut butter cups
Frosting:
6 ounces of semi sweet chocolate, chopped
2/3 c heavy whipping cream
1/3 c peanut butter
Additional miniature peanut butter cups, chopped
1. In a large bowl, combine the cake mix, water*, peanut butter, oil and eggs; beat on low speed for 30 seconds. Beat on medium for 2 minutes or until smooth.
2. Fill paper-lined muffin cups half full. Place a peanut butter cup in the center of each cupcake. Cover each with 1 TBs of batter.
3. Bake at 350 degrees for 18 to 22 minutes or until a toothpick inserted near the center comes out clean. Cool for 10 minutes before removing from pans to wire racks to cool completely.
4. Place chocolate in a small bowl. In a small saucepan, bring cream just to a boil. Pour over chocolate; whisk until smooth. Stir in peanut butter. Cool, stirring occasionally, to room temperature or until ganache reaches a spreading consistency, about 10 minutes. (I had to stick in the freezer for a few minutes because it was still too soft after 10 minutes).
5. Spread over cupcakes; immediately sprinkle with additional peanut butter cups. Let stand until set.


*I used homemade buttermilk
Editor’s note: Reduced-fat or generic brands of peanut butter are not recommended for this recipe (and really why would you try to save a few tiny calories anyway?!).

How on Earth I reached the age of 30, er I mean 29 and have never made cupcakes is beyond me. I'm probably the only female over 15 who hasn't. Nevertheless it's true. At least it was true until Genevieve's dedication luncheon. Despite my fear of baking, I couldn't help but try my hand at them...It was only a matter of time, given America's latest obsession with cupcakes. Since I am not a baker at heart and had zero experience I decided to amend a basic store bought cake mix and make the icing from scratch rather than make everything from scratch. I found a good recipe in "Women's World":
Perfect cake-mix cupcakes:
1 pkg cake mix such as classic vanilla or devil's food
1 cup buttermilk in place of the water called for in the package
Vegetable oil (the amount on the pkg)
4 eggs in place of the number called for on the package
- Preheat oven to 350 F. Line muffin cups with paper liners. Prepare cake mix according to package directions in a large bowl, using the buttermilk instead of water, the oil, and the 4 eggs. Beat with an electric mixer until moistened, about 30 seconds. Increase the speed to high and beat until thick, 2 minutes longer.
- Spoon half the batter into a large ziploc bag, press out the excess air and seal. Snip a 1/4" corner from the bag and fill the paper liners two thirds full. Repeat with the remaining batter. Bake until golden (if using a light colored cake mix) and a toothpick inserted comes out clean, 15-20 minutes. Remove the cupcakes from the baking pan, place on a wire rack and allow to cool completely. Makes 24 cupcakes.
 A few notes: This recipe is SUPER easy. If I can do it; anyone can! Secondly, I'm not sure why it calls for putting the batter in the ziploc bag half at a time. That was annoying. Next time I'll put all of the batter in at once. Lastly, I didn't want to waste money on a quart of buttermilk when I only needed a cup (and my mom insisted that I could make it with milk and vinegar). After googling it to make sure my mom wasn't making it up (why I doubt her I have no idea. She knows everything about homemade cooking.), I followed her advice and added a TBS of vinegar to a cup of milk and let it stand for 5 minutes).
For the icing, I wanted something creamy and sweet but not store bought. I used Magnolia's recipe. There are a few different versions of it online but I trust foodnetwork so I used theirs. Click here for recipe.
I added a few drops of food coloring (ok, I asked my little sister to do it for me) and voila! They came out perfectly. They were light, fluffy, and sweet! When my adorable nephew Luke tasted one, hugged my neck and said "Aunt Tiffany you're the best" I knew I'd accomplished my mission!

Who doesn't love a delicious cupcake? Pretty much noone. So how can you make a sugary sweet confection even better? Why dress it up of course! I came across these Meri Meri Cupcake Sets and think they are the cutest and SIMPLEST way to dress up your average cupcake for an event. Whether the theme of your event is fairies, princesses, pirates or even fire trucks, there's a cupcake set that's perfect for you. And at only $11.95 for 24 wrappers and embellishments, it's a truly easy way to elevate a simple treat to an unforgettable favor. Some of my favorites:


All available at the Meri Meri Shop!
Though I aspire to become more of a true chef in life, I am at heart a baker. I love making cupcakes, muffins, cookies, cakes, and basically anything I really should NOT be eating. Therefore, it comes as no real surprise that I have this intense desire to collect cake plates. What better way to show off a true home-baked masterpiece than on a fabulous elevated pedestal?? With so many styles out there from the modern clear glass versions to old-fashioned colored ceramic beauties, there's a cake plate for just about every person's tastes. Here are a few I'd love to start my collection off with....


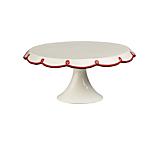


A modern take on the old classic domed stand. I can just picture a pile of freshly baked blueberry muffins or a crumbly coffee cake resting underneath that beautiful lid!
Another domed one, but this one doubles as a punch bowl when you simply flip the lid... ingenious!
Why yes, these DO deserve a luscious Red Velvet cake to top them off.... how perceptive of you!
Laurie Cake Pedestal $19.95 at CrateandBarrel.com, Emile Henry Ruffled Cake Stand $70.00 Williams-Sonoma.com
If the good old cupcake tower is getting old, how about showing off your mini treats in these gorgeous domed creations?
Glass Pedestal Stand and Dome $14.00 at PotteryBarn.com
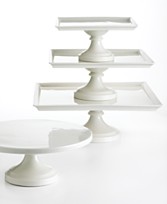
And from the queen of domestic bliss herself, Martha's take on cake stands both square and round... classics by themselves or even more impressive stacked!
Martha Stewart Collection Whiteware Cake Stands $22-$42 8" - 12" Macys.com