It's time I finally share Dax's nursery. And admit to myself and to you that it might not ever be 100% complete! It's good enough for now. And I'm excited for you to see it.
Currently I have guests staying in the nursery so I can't give you a real sneak peek. So I decided to throw together a little e-peek. All of the items pictured are currently in the nursery. There is more to of course--a fun yellow side table, shelves, woodsy/rustic art, and fun DIYs, but this is the best I could do with items available online. My instagram friends have asked to see more so hopefully this tides you over! Oh and if you don't follow on instagram, there are more "real" sneak peeks there.
{via}
Or really, in my case, toddler room art. I've been slowly chugging along in re-decorating Genevieve's toddler room. It's been sloooooow going but I feel like I'm FINALLY making some good progress. As for an update:
Nadia is 8 weeks old and I am finally finished her nursery. Actually I'm lying. I still have one more tiny task to take care of but it requires shopping around for the perfect thing and I don't know how long that might take (I mean it IS me, after all!). But more on that later...
Nadia's Nursery was such a fun adventure. I really wanted to create a fun, unique, functional nursery on a budget. I wanted it to reflect my style but also be suitable for a baby/toddler and a happy place for Nadia. I have a love/hate relationship with decorating. On one hand, I love it. I love all things pretty and the thought of creating a space that makes me feel a certain way is a welcomed challenge. On the other hand, I am very indecisive, can have a hard time visualizing the finished project, and am painfully aware of my shortcomings when it comes to interior design. But when all is said and done, I love learning about design and learning how to execute my ever evolving style.
Initially I had several different design schemes I really liked for Nadia's nursery. One involved a palette of beige, cream, taupe, and white...a peaceful, natural vibe. One involved Joel Dewberry's aviary line with a rustic woodsy feel (I have to admit part of the draw here was using owls which despite their trendiness, I think are simply adorable). The next involved a modernly shabby chic feel with florals and distressed furniture in a palette of bubble gum pink, red, and aqua. The last was a girly room of bright colors- aqua, pink, and yellow, with an ethnic vibe- based on Dena Fishbein's Kumari Garden line. Hey, I warned you about my indecisiveness! I dropped the Joel Dewberry version and then showed photos and described my 3 ideas to my super artistic sister and my designer friend and they both gave me the same advice: combine all three. At first I wasn't sure if I could do that--I'm a bit of a design schizo and I felt like they were all so different. But the more I thought about it, the more I felt like I could totally take my favorite elements from each scheme and make it work. So that's what I did. I did give one priority and that was the Kumari Garden inspired room.
I had crib bedding made from it and the rest flowed from there. From the peaceful beige palette, I took the natural elements and used DIY drop cloth curtains, the cute hamper, the natural blond wood shelves, and woven accessories. From the shabby chic scheme, I took the aqua and pink, used a painted yellow dresser, and painted and distressed an antique dry sink to re-purpose as a changing table. I also used the ornate (and yes, ubiquitous) ung frame. The goal of "ethnic" might not have been achieved. I ordered a Moroccan Pouf from Morocco (yes straight from Morocco) and it ended up being a total NIGHTMARE!!! I ended up returning it and since I can't afford the $400 version and am now deathly afraid of ordering a cheap one after my experience (let's just say it involved goat urine. yeah that happened), I had to give up that dream. I also ordered a cool coffee sack pillow that I thought gave it an ethnic vibe, but that too didn't pan out. I won't give you the boring details...I did however create this cool (if I do say so myself) Chinese lantern, pom, and lace lantern mobile and order this beautiful print from Jones Design company--all of which I think contribute to an ethnic feel. And the Dena Fishbein print which was the entire inspiration, is one of the beautiful prints in her Kumari Garden collection which invokes an ethnic bohemian vibe. I also used her Tarika in gem as well as the Sujata in pink prints.
One last note and then I'll shut up! One of the most fun things about this room was doing it on a budget (Not as super tight as Genevieve's nursery but not nearly as expensive as many of the nurseries I ogled on design blogs). Many of the items in her room came from thrift stores, yard sales, and even the side of the road. I loved upcycling the changing table and painting the $20 yard sale dresser a cheerful yellow.
So here are some photos for your viewing pleasure (sources for almost everything at the very end)...
Nadia's Nursery was such a fun adventure. I really wanted to create a fun, unique, functional nursery on a budget. I wanted it to reflect my style but also be suitable for a baby/toddler and a happy place for Nadia. I have a love/hate relationship with decorating. On one hand, I love it. I love all things pretty and the thought of creating a space that makes me feel a certain way is a welcomed challenge. On the other hand, I am very indecisive, can have a hard time visualizing the finished project, and am painfully aware of my shortcomings when it comes to interior design. But when all is said and done, I love learning about design and learning how to execute my ever evolving style.
![]() |
| my inspiration. |
I had crib bedding made from it and the rest flowed from there. From the peaceful beige palette, I took the natural elements and used DIY drop cloth curtains, the cute hamper, the natural blond wood shelves, and woven accessories. From the shabby chic scheme, I took the aqua and pink, used a painted yellow dresser, and painted and distressed an antique dry sink to re-purpose as a changing table. I also used the ornate (and yes, ubiquitous) ung frame. The goal of "ethnic" might not have been achieved. I ordered a Moroccan Pouf from Morocco (yes straight from Morocco) and it ended up being a total NIGHTMARE!!! I ended up returning it and since I can't afford the $400 version and am now deathly afraid of ordering a cheap one after my experience (let's just say it involved goat urine. yeah that happened), I had to give up that dream. I also ordered a cool coffee sack pillow that I thought gave it an ethnic vibe, but that too didn't pan out. I won't give you the boring details...I did however create this cool (if I do say so myself) Chinese lantern, pom, and lace lantern mobile and order this beautiful print from Jones Design company--all of which I think contribute to an ethnic feel. And the Dena Fishbein print which was the entire inspiration, is one of the beautiful prints in her Kumari Garden collection which invokes an ethnic bohemian vibe. I also used her Tarika in gem as well as the Sujata in pink prints.
One last note and then I'll shut up! One of the most fun things about this room was doing it on a budget (Not as super tight as Genevieve's nursery but not nearly as expensive as many of the nurseries I ogled on design blogs). Many of the items in her room came from thrift stores, yard sales, and even the side of the road. I loved upcycling the changing table and painting the $20 yard sale dresser a cheerful yellow.
So here are some photos for your viewing pleasure (sources for almost everything at the very end)...
The details.
| One of my absolute favorite features! Lantern and pom mobile inspired by hers and hers. |
Upcycled changing table. Handmade changing pad cover in another coordinating print- Sujata in Pink.
Ha- she wouldn't wake up!
| Natural wood shelves-- styled but functional. |
The box is one that a toy came in. I held onto it because I thought it was too cute to throw away. I thought of lining it with scrapbook paper and using it for diapers. I'm bummed I didn't take the photo when she was in tiny newborn diapers!! Now she's in size 2s. How fast time flies right?!
How adorable is the rag doll?!
I love fabric hoops--I wish I'd done more of those. Easy, cute and cheap! I lined that frame with burlap and then used a decal I purchased for the month by month pictures as decor. The flower is what she wears in those photos. I stuck it up there just so that I wouldn't lose it between those photos and then thought it was cute, so it stayed.
The photo is of Nadia and Genevieve's feet Genevieve is doing "this little piggy" on Nadia's toes. So cute!!
I love this 'fruit of the spirit' art. :) Unfortunately
I didn't know what I planned to do with these frames when I bought them so
I only bought six. One would think that was enough right?!
Well later I thought of using the fruit of the spirit but there are
9 fruit. So I had to choose my favorites (sorry God- I know they are all
important) to frame. Kind of silly but I couldn't let go of the idea once
I started on it...This is also the last task I need to complete- I plan to use
one big frame (either thrifted or handmade) around all the little frames...
The centerpiece of the room :)
Love this
handmade pillow! This is where I will use the coffee sack pillow
as well...
Other side of the handmade pillow. I
used a coordinating print for this side- Dena Fishbein's Tarika in Gem.
This was a simple DIY- I used pom pom
fringe on a store bought lamp. How cute is that?! Incidentally
now I want to add pom pom fringe to....like everything!
DIY
dresser in "cheerful" yellow. Both the dresser and mirror were
from yard sales. Originally I was looking for a dresser with better lines but since I found the mirror with the finial it made me feel better about the somewhat plain dresser and reminded me of this inspiration piece..
View from the door.
View from the door. (I need to find a bigger rug but that one will do for now).
DIY
drop cloth curtains. So simple. Buy drop cloth, hem (sew or hem tape), buy rings and
rod, embellish (pom pom fringe!), and hang. voila!
Another crib shot. Just because I love it.
Cozy nook for nursing. I love it here. (Well not at 3 am, but y'know) ;)
Can you believe I found this chair on the side of the road?! A modern rocker like this would easily cost $800 to $1000 new. I had it reupholstered for less than half the cost. I love it.
Well there she is ladies (and our one male follower) ;) See below for resources. And if you've decorated a kid space recently, what tips or tricks do you have? What are your favorite sources for design? Do tell...
Sources (in no particular order):
scalloped side table- Walmart.com
pom pom fringe- Trimko Etsy store
crib pillow- Habitation Etsy store
custom crib bedding- Handmade by Elena Etsy store
ornate frame- ung drill from IKEA (burlap and cardboard letter from Hobby Lobby)
Dena Fishbein fabric- Hawthorne Threads
drop cloths- Lowes
pink, yellow, and white frames- Christmas Tree Shop (CTS)
magazine rack- side of the road :)
rise and shine print-Jones Design Company (frame from CTS)
lamp- Target
laundry hamper- TJ Maxx
shelves- IKEA (not sure if it's that exact one but it was $5).
decorative items for shelves- TJ Maxx, Homegoods, CTS, Hobby Lobby
rocking chair- side of the road :)
fabric for rocking chair- fabric.com
reupholstered by- 2 NH Guys' furniture repair (No website but I can get you their contact info if you're interested. Reupholstering is PRICEY but they were the cheapest I could find).
pillow on rocking chair- Festive Home Decor Etsy store
throw on rocking chair- Amazon
ottoman- Morocco. (ha, just kidding). CTS
rug- HomeGoods
chandelier- Diapers.com (update: no longer available there but Amazon sells it here).
changing pad cover- handmade
changing table- thrift store
crib- Target but discontinued (which may be why I paid $67 from $270!!!)
So Nadia is 5 1/2 weeks old and yes, the nursery is still progressing. I have a few more tasks to accomplish. But just so you don't think I'm lying about it, I figured I'd post this photo that Melanie of Simply Mella was kind enough to take when I wasn't even looking. I love all of these elements she captured and if I could have chosen three items to take pictures of in a room full of stuff I would have chosen these three! So take a look...and I promise a full nursery reveal is coming....
1. Inspirational Print. 2. Fun chandy. 3. Lantern and Pom cluster (to be detailed in a later post :)
[click photo if you'd like to see a larger image].
For Genevieve's nursery, I went with an old dresser (see this post) and loved the idea of repeating that for Nadia's nursery. You can usually find something less expensive and with a bit more character and better quality than one you'd find at a furniture store or even a box store. In a happy coincidence, I found the matching dresser to the one I bought for Genevieve at an antique store. It was exactly the same down to the adorable heart cut out at the bottom, but was small enough to fit in the room with the changing table. But when I went to the store the bottom drawer wouldn't open and I knew that would drive me crazy. I was so sad but in the end this other number was cheaper and actually works perfect with the space. It's not quite as high quality- it's basically one of those affordable pieces you'd find at an unfinished furniture store like a the mill store. But at only $20 at a yard sale, it was good enough to do the trick.
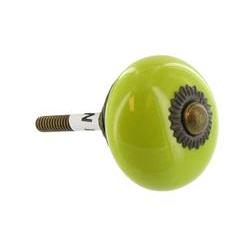
So now that I'd found the piece it was time to choose a color. The primary colors in my inspiration 'piece' were yellow, blue, and pink. I knew I wanted a cheerful yellow. I'd gone back and forth about painting a jenny lind crib a bright yellow (see this post) and love the look of yellow against aqua or pale blue (the color of her walls). Since in the end I decided I didn't have the stamina to tackle a crib project, I figured I could get the same effect with the dresser. I picked the happiest, truest yellow I could find and went to town. I ended up doing a couple of coats of primer (tinted for the last coat) and then two coats of the yellow paint. For finishing touches, like in this project, I skipped the pricey anthro knobs for Hobby Lobby ones. And they were on sale! This project cost a total of $52. That's a fantastic price for a decent quality dresser, especially after adding unique touches in a fun paint color and 'custom' knobs).
I've included before and after pics, as well as a couple of my inspiration pictures for the dresser. Even though I'm a big fan of paint, I'd never gone with such a bold color so it helped seeing someone else do it with such success. I LOVE color so I don't think I'll tire of it and I could totally see it growing with Nadia or in the girls' playroom later on for extra storage. (uh because right now, we don't have a playroom, or wait, are toys strewn about the house considered a play room because if so, than yeah, we totally have one). I also included the 'better' pics I promised in this post. Oh and please ignore the super close up off center photography. If you want the honest truth I was zoomed in so tight so that I wouldn't have to sweep the trash up around the dresser. Yes I was thattired, exhausted, busy, lazy.
As you can see, I've had a ton of fun pulling together old and new pieces for her room. So far, the magazine rack was from the side of the road, the dresser from a yard sale, and the changing table from a thrift/antiques store. Totally loving the re-use, re-purpose, recycle approach to design!
Inspiration:
What do you think? Have you painted any furniture (or anything) a bold color lately? Do share!
So now that I'd found the piece it was time to choose a color. The primary colors in my inspiration 'piece' were yellow, blue, and pink. I knew I wanted a cheerful yellow. I'd gone back and forth about painting a jenny lind crib a bright yellow (see this post) and love the look of yellow against aqua or pale blue (the color of her walls). Since in the end I decided I didn't have the stamina to tackle a crib project, I figured I could get the same effect with the dresser. I picked the happiest, truest yellow I could find and went to town. I ended up doing a couple of coats of primer (tinted for the last coat) and then two coats of the yellow paint. For finishing touches, like in this project, I skipped the pricey anthro knobs for Hobby Lobby ones. And they were on sale! This project cost a total of $52. That's a fantastic price for a decent quality dresser, especially after adding unique touches in a fun paint color and 'custom' knobs).
I've included before and after pics, as well as a couple of my inspiration pictures for the dresser. Even though I'm a big fan of paint, I'd never gone with such a bold color so it helped seeing someone else do it with such success. I LOVE color so I don't think I'll tire of it and I could totally see it growing with Nadia or in the girls' playroom later on for extra storage. (uh because right now, we don't have a playroom, or wait, are toys strewn about the house considered a play room because if so, than yeah, we totally have one). I also included the 'better' pics I promised in this post. Oh and please ignore the super close up off center photography. If you want the honest truth I was zoomed in so tight so that I wouldn't have to sweep the trash up around the dresser. Yes I was that
As you can see, I've had a ton of fun pulling together old and new pieces for her room. So far, the magazine rack was from the side of the road, the dresser from a yard sale, and the changing table from a thrift/antiques store. Totally loving the re-use, re-purpose, recycle approach to design!
Inspiration:
Click here for details and to see the before. This girl is amazing!
Click here for details- once again, from HiSugarPlum!
Love the yellow crib against the blue wall. Just darling! From here.
and now MY work of art. Ok that is a bit of a stretch. ;)
What do you think? Have you painted any furniture (or anything) a bold color lately? Do share!

A while ago I posted about finding instructions on making a changing pad cover on Chic & Cheap Nursery. I'd been daydreaming about re-learning to sew anyway and this seemed like the perfect, simple project. Of course I initially wanted to make an entire crib bedding set--sheet, bumper, and crib skirt--but then it dawned on me that I'm not freakin Martha Stewart. That said, I figured I could still manage a changing pad cover. I bought the material from Hawthorne Threads and Fabric.com. They have an amazing selection and reasonable prices. This post isn't really a tutorial because a) I am such a beginner that I am in no way qualified to walk you through this process and b) there is a perfectly swell tutorial posted at Prudent Baby that I followed. I will offer one piece of advice- Make sure you sew the tube big enough for the elastic. I didn't on my first cover (yeah that's right, I made two- are you impressed?!) and it was the most agonizing process using a tiny safety pin to string through the elastic. What took me 5 minutes or less took me at least 20 minutes the first time around. Oh and the fact that I made two should tell you that this is definitely a project you can handle. I haven't sewn since I was 13 or 14 and had no idea what I was doing--but I followed the instructions and the cover came out fine. The first one is a bit rough if you look at the details but the reason this is such a perfect project for beginners is that none of those details show! The second one came out much neater and though still not expert quality, a little more polished looking. The other thing I love about this project is that a 'designer' changing pad cover or a custom cover from a site like etsy usually will run you $40+. Here is the cost breakdown for this one:
2 yards of fabric: $21 including shipping
elastic: $0 already had
thread: $0 already had
Total: $21
As for the final cost, it could cost even less...the tutorial calls for a bit less fabric, you could buy locally to avoid paying shipping, and you could also use less expensive fabric, so this number can be whittled down. Also, for one of the two covers, I ordered the material from fabric.com with another fabric purchase, got 20% discount, and didn't pay for shipping so that brought the price down.
So, I think I will keep at it. I really like making stuff. :) If you try this you MUST email me pictures (tiffandmeg@gmail.com) or post a link to a photo. I'd love to see it!
Wanted to let you know Taste{full} was featured on {live the fancy life} today! While we've been featured on blogs after endorsing or reviewing a product, I think this is the first time we've been featured for our amazing creative DIY genius a before and after/DIY post! ;) Like many others, I stumbled upon Jessica's blog after her nursery was featured....well to be honest I can't remember because it's been featured everywhere!! Her adorable son Bodhi's nursery is an awesome modern creation and was my first inspiration to create a lantern mobile (more on that later if I can actually pull it off) for new baby's room. Check out her blog here, the post here, and her son's chic nursery here. Enjoy!
The biggest project I accomplished during my week of vacation was painting the changing table. This project was a little scary for me. First of all, it involved real paint, not spray paint. Secondly it involved an antique dry sink. Yes, rather than purchase the expensive changing table I'd been eyeing, I encountered an incredibly talented saleswoman at an antiques/thrift shop who suggested the dry sink as a changing table. I suppose in hindsight I wasn't really a tough sell. I was in awe of everything in that store and wanted desperately to buy something. We'd found out new baby was a girl and the modern changing table I wanted fit better in my 'boy' room--the one I'd been unconsciously designing in my head while convincing myself I wasn't convinced that it was a boy. :) Anyway, I loved the idea of using something completely out of the ordinary and I loved the price-- $80 which I bargained down to $70. Apparently dry sinks are one of the easiest "antiques" to replicate and fake so I have absolutely no idea if it's a real antique. Lucky for me, I don't really care. But the fact that it was this knotty pine and had a...country look to it was the scary part. I'm all about modern, or shabby chic, or even contemporary/traditional, but "country" is the one style I am not a big fan of. Since I constantly am perusing etsy and various design blogs however, I saw it's potential to be more shabby chic or even farmhouse chic. [Note to self: anything sounds cooler with "chic" added to it]. I also have been desperate to try distressing furniture (I've always loved it, but my recent obsession is mostly due to these gals. Check out better pictures of their stuff in this post over at HowDoesShe) and thought this would be the perfect piece to try that on. A fun color, a little distressing, and a cool anthropologie knob would do the trick right?!
I won't give you the play by play because it was really quite simple. But here are a few things I learned. I'm new to painting furniture so I didn't know about zinsser. But now I do. It totally saves you from the sanding part which is really the worst part. I'm learning sometimes it still helps to sand for other reasons than paint adhesion but for this project I got to skip that part. I also have learned to prime, prime, prime. So I did. I also tinted my primer which totally helped. Not only did it help with fewer coats of the color paint but it also helped me see where the wood (specifically around the knots) was still bleeding through. After 3 coats of primer and 2 coats of Sherwin Williams "Belize" (tinted 25% darker), I was almost done. Next came sanding. I'm not gonna lie; I was scared. The thought of sanding paint off of a piece that you just spent hours painting is quite scary. But I conquered my fear and did it anyway. I used my father in law's sander again, which was easier than sanding by hand (though by hand is totally doable). And as the fancy farmgirls say, it's quite addicting!! It looked so much cooler after the sanding. I did mess up at one point but I just painted over it and you couldn't even tell! That's the beauty of distressing. Obviously more is less since you can always go back and sand some more but re-painting may be tricky. Lastly, I added this cute little knob from anthro. Ok, I'm totally lying. Rather than spend the $8 + shipping for the knob at anthro, I scored this just-as-cute version at Hobby Lobby for $2.99! So that was it. Well technically that's not it--I still have to poly it to resist scratching. But that's it for now. (I'm trying to convince husband to poly everything I'm painting so I don't have to. I'll let you know how it goes). Now for the finished result:
![]() |
| Hobby Lobby Version |
![]() |
| Anthropologie Version |
I won't give you the play by play because it was really quite simple. But here are a few things I learned. I'm new to painting furniture so I didn't know about zinsser. But now I do. It totally saves you from the sanding part which is really the worst part. I'm learning sometimes it still helps to sand for other reasons than paint adhesion but for this project I got to skip that part. I also have learned to prime, prime, prime. So I did. I also tinted my primer which totally helped. Not only did it help with fewer coats of the color paint but it also helped me see where the wood (specifically around the knots) was still bleeding through. After 3 coats of primer and 2 coats of Sherwin Williams "Belize" (tinted 25% darker), I was almost done. Next came sanding. I'm not gonna lie; I was scared. The thought of sanding paint off of a piece that you just spent hours painting is quite scary. But I conquered my fear and did it anyway. I used my father in law's sander again, which was easier than sanding by hand (though by hand is totally doable). And as the fancy farmgirls say, it's quite addicting!! It looked so much cooler after the sanding. I did mess up at one point but I just painted over it and you couldn't even tell! That's the beauty of distressing. Obviously more is less since you can always go back and sand some more but re-painting may be tricky. Lastly, I added this cute little knob from anthro. Ok, I'm totally lying. Rather than spend the $8 + shipping for the knob at anthro, I scored this just-as-cute version at Hobby Lobby for $2.99! So that was it. Well technically that's not it--I still have to poly it to resist scratching. But that's it for now. (I'm trying to convince husband to poly everything I'm painting so I don't have to. I'll let you know how it goes). Now for the finished result:detail:
Now it's your turn; have you repurposed anything lately that you want to share? Do tell...
I'm totally behind in posting details of my projects... I blame husband because in order to take "after" pictures, I have to move furniture...which I can't (or at least shouldn't be doing). And I refuse to take pictures of newly painted did-it-myself treasures in the most disgustingly crowded and disorganized garage you've ever seen. seriously. EVER. (ok maybe not if you watch hoarders. Wow, am I really comparing myself to a hoarder now?!). But I felt compelled to post my to-do list so you can see that I am in fact making progress and plan to post about every last one within the next month. After that, new baby will be here and I make no such promises to do anything. Except multiple feedings per night, nursing all day, and changing tons of tiny diapers. Which sounds exhausting, but I actually just got a pitter patter of excitement in my heart of when I thought of my new baby girl and her little tiny bum. [happy sigh].Make lantern mobile-- I've gone back and forth between a couple of different types but can't actually make this until the room is partially put together... more to follow!
Paint frame for baby's initial-- can't do this until the room comes together...not sure what color to go with just yet!
Paint side tables for living room-- one of the things that totally fell off the list. Not likely to happen any time soon!
To Buy:
Dresser for Genevieve's room--still looking for this one. I want a good quality wooden dresser with nice lines for less than $50 (of course I plan on painting it). Is that too much to ask?!
Curtains for new baby's room--thinking of going with the drop-cloths-as-curtains trend...more to follow!
PS-these nurseries are just eye candy- not anything like new baby's other than blue walls...and pink elements (of course). Picture 1 from here. Picture 2 from here.
Random thought: I find it funny that my posts used to center around clothes and shopping and now they tend toward children and babies. I guess it's just a natural progression. I'm also guessing most of you don't care about the latest in maternity wear anyway. ;) Hopefully regardless of where you are in life (single [free], married no kids [fun], or a full brood [um, fulfilling?]) you can find something interesting or fun or useful for now or the future. And if all else fails maybe you can laugh at me for how ridiculously obsessive I get over whatever phase I am in-- clothes, kids, shopping, decorating... Regardless of one's lot in life, I'm all about living it as taste{full}y as possible...Now, on to lighting...
I am making huge progress on new baby's nursery. I still have not painted the room yet [sigh], but I did get her dresser painted this weekend. As far as purchases, all I really need are a rug and a light fixture. I really wanted this one (left). However, it's a whopping $79 + shipping and a shipping surcharge! While I am not scrimping as much as I did on Genevieve's nursery, I'm also not in the position to splurge so much on a light fixture so I sadly decided to forgo the fun gypsy chandy.
And then guess what happened?! Last night, while browsing cheap and chic nursery, I came across a design board that featured my long lost friend! Only this time, it was on diapers.com for a mere $59 with free shipping. As far as I can tell it's exactly the same as the $104 number! Score! It's smaller than the blue one, and just as cheap. I'm still a bit torn as I'm going with a lot of color in her room and I don't want to be over the top...not to mention I was planning on going with the simple swag option of the aqua chandy above to save my husband the grief of installation and I'm not sure that's an option with the gypsy light. So I'm not 100% sure which direction I'll go in but I love that I found it for cheaper--never thought that was possible!! I'll keep you posted on what I choose and continue posting about my nursery progress along the way! Meanwhile, let me know-- which light do you like? Or are there any other cheap ($75 or less) options I should know about?! Do tell...
Then I came across this one...which just about wiped my sorrows away! Only $60 and free shipping. Now, that I can get on board with! It's' the same color (or close enough) as the nursery walls and I can't help but love its sparkle. However when it arrived it was a bit bigger than I imagined. Our ceilings aren't very high (and husband and I are both six feet tall) so I'm concerned that I may have to hang it in the corner or somewhere other than the middle of the room. No matter how cool it is, do I really want to bang my head against it at 2 am just before feeding new baby? Um, no thank you. But I was (am) determined to have a pretty light fixture in her room (clearly I'm still getting over the fact that Genevieve has a boring 'ol ceiling fan).
♥ Tiffany