A Small Playroom Gets a Functional Makeover
1:35 PM
rustoleum green chalk paint | black clock | animal busts | hello sign alternative | canvas | elephant head alternative
Read on for tips, before and after pictures, and sources at the end!
Tip 1: If you are designing your own small playroom, review the post I mentioned earlier- the first step is take everything out. I mean it. EVERYTHING!
Toy Storage in the Playroom
Tip 2: when deciding what to keep, take note of what type of items you have- that's step 1 in determining the type of unit to store them in.
Do you have dolls, barbies, little cars, big cars, little characters, bulky toys, toddler toys? Early on I had only the Trofast system and I LOVED it. It worked so well for our needs. You can see it in action here. Then I added shelves to it and loved it even more (seen here). But as they get older, their toys get smaller and this Kallax system works so great for that. The little clear bins are about a dollar from Target and house smaller legos (Dax only has one Duplo set so I keep it separate from his Megabloks), these natural blocks, my little ponies, and Teenage Mutant Ninja Turtles. The Trofast has playdough stuff, Barbie furniture, and miscellaneous toys that I should get rid of. Really, I could consolidate those two into one- I'm only hanging onto the other to fill with the smallest size bins and use for Legos. (Lord help me).
We have some bulky toys like these guys that sit to the left and right of the Kallax. Joe made this little garage for Dax (sweetest thing ever right?!) but it's large so I had to save floor space for it. The girls also have an Our Generation Camper on the other side.
Tip 3: The second way to determine what storage units you need is to plan out the wall and floor space you'll use. This is especially important in a small playroom.
I knew I wanted one wall clear of toys- toy bins on every surface would feel overwhelming. Once I knew what type of toys I had and decided to add a Kallax to the mix, I taped off the size of the Kallax on each wall to see where it looked best.
After doing this, I realized the Kallax wasn't too big for the space at all but would look best on the opposite wall.
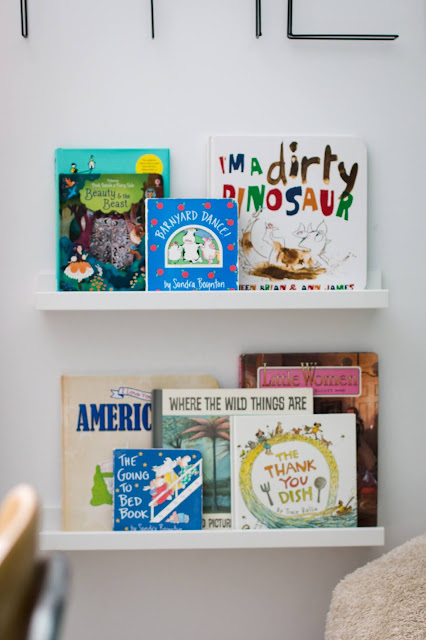
Book ledges are a GREAT space saver when it comes to small spaces.
My labels are off- one should say 'dolls.' As you can see we have a vehicle hoarding problem.
These amazing bins are sold out (the price was so good!) but here are some great options:
The Playroom's Use
Tip 4: Think about how your kids use the space as-is and how you'd like them to use the finished space.
Since my kids are school age and inching dangerously close to the 'hang out' phase of life (#sayitaintso), I wanted to incorporate room for lounging, reading, and even screentime (there's no door on the playroom so I can hear what they're doing and/or check in often!) I would've loved a futon or sofa but there just isn't room while they still have lots of toys, so I settled for a bean bag with books nearby. Hint, hint kids! Other activities might be arts and crafts, playing games, etc. I pretty much covered my bases with a big chalkboard wall, the bean bag, and the table.
The Playroom's Style
Tip 4: Infuse some style and personality. Add some wall art, decorative storage, and a few fun elements to keep it cute.
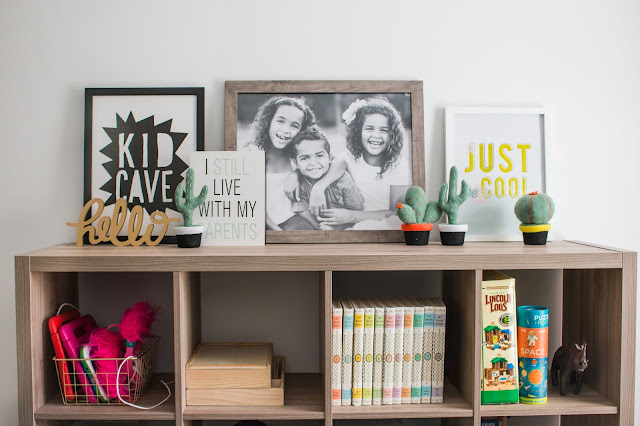
Kid Cave print | Parents print (same phrase)
Obviously, a playroom should be functional but the fun part is making it cute! I wasn't sure which direction I'd go in, but once I decided on the green chalkboard wall, a vintage school feel, with a modern bohemian vibe just felt right. I added the school chairs (the LUCKIEST $15 flea market find) and the clock for that schoolhouse feel. I stopped short of this schoolhouse light fixture whose price was much higher at the time. For the bohemian elements, I added the belly baskets, Opalhouse garland (sadly it's sold out but there are so many cute ones on Etsy), woven storage bins (similar), mini peacock chair, and airy pink curtains. The Kallax unit, art, and decorative items are modern.
Small gray globe | big bronze globe (very similart)
Here are photos of the entire space and a few before and afters. You can tell how small it is from these photos (although the high ceilings help!).
you can see the light fixture in this shot- I love it and it's SO affordable!
I also have been toying with the idea of removing the table so I took this picture for myself. ha. I love a little table in there but Dax basically has a city situation with all his car sets and sometimes floor space is paramount.
This is the view from the doorway.
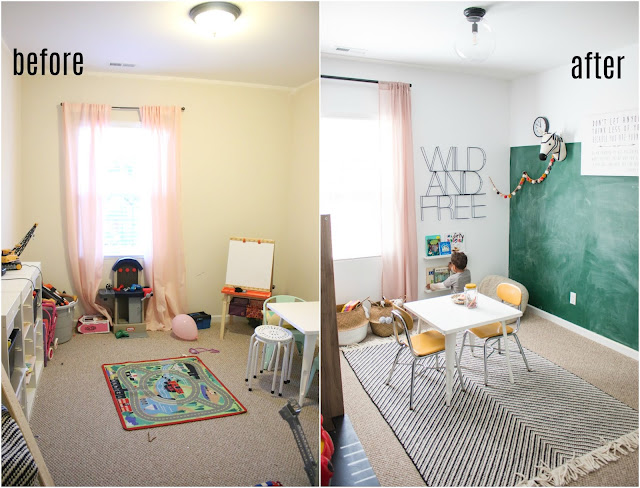
Before and After
What a difference right? And I know I should've cleaned it before the befores. I literally just remembered to snap the photos as I was emptying it out per tip 1. ;)
Phew, that was a lot of pictures of a tiny space. Thanks for staying with me. Some of the sources are below (affiliate links are included), but please let me know if you have questions about any item you see or how we use the space! UPDATE- the adorable 12.99 garland is back!


2 comments
It looks incredible. Like seriously, so good!! This makes me want to re-do our office/playroom shared space!! I might need some of your tips!
ReplyDeleteThanks so much!! It feels good to have it organized! (although every time it comes up, months later, I'm reminded that I need to do another purge!).
Delete