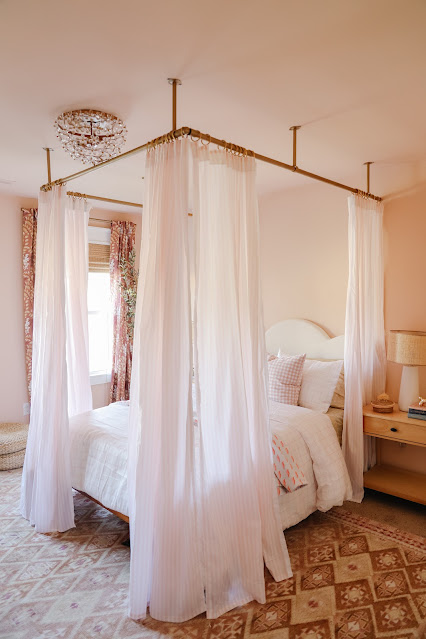
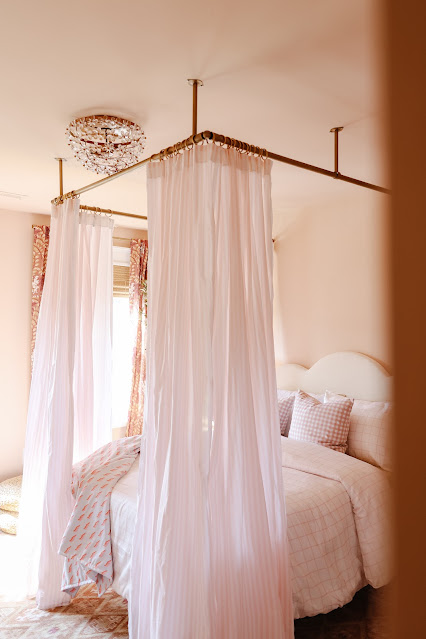
How To Make a DIY Bed Canopy
8:41 AMThis post contains Affiliate links. As an Amazon Associate I earn from qualifying purchases.
Supplies for Canopy Frame
Note: These are the supplies used for a 3 sided canopy. If you plan to have a 4 sided canopy, adjust as needed.
Three 3/4 10' PVC pipes- alternatively you could use curtain rods but PVC is $4/pc and I like its uniform size.
Acetone- I used 100% acetone nail polish remover
Primer- optional but recommended
2 Corner Curtain Rod Connectors
Ceiling EZ anchors- optional but I recommend it for durability
Supplies for Canopy**
Fabric (I used almost 16 yards of this in cotton lawn) or 6 curtain panels
Curtain Tape - optional if you're using premade curtains
Sewing Machine or no-sew hem tape- to make panels, add curtain tape, and/or adjust length of premade curtains
*Use these if you want your canopy to be closer to the ceiling or these, if like me, you're working around a fixture and/or want a shorter canopy. The higher the canopy, the more fabric or longer length curtains you'll need. Also if you're hanging heavier curtains you may want to consider using 8 rods rather than 6.
**See note at bottom regarding DIY panels
Tools
or
Step 1: Determine Measurements. Measure from the wall, just past the bed for the side pieces. Make sure it's long enough so that the fabric hangs down over the mattress vs. landing on top of it. Measure the width of the frame and add about 2 inches so that the frame is slightly wider than the actual bed frame. Then deduct 2" from all measurements to compensate for the corner brackets. i.e. the total width and length should include the length/width of corner brackets.
Step 2: Measure and mark your PVC. Cut it using whichever tool you have- I used a table saw. Make sure to wear protective glasses b/c tiny pieces of plastic will fly! Once you measure one long piece and are sure it's accurate, you can use it as a guide for the other piece.
Step 3: Rub the PVC down with the acetone. This will make the paint adhere better and will also make the writing less visible. I've also heard sanding it helps but I didn't do this. Spray the PVC. I recommend using primer first but I didn't do that either. #lazygirlDIY.
Step 4 (optional): Assemble the frame- slide the PVC rods into the corner connectors, but don't tighten the corner pieces too tightly, and make sure it fits properly over the bed. If it fits and doesn't need adjustments you're good to go and can disassemble it.
Step 5: Find the center of the canopy frame (for us this was 29") and align it with the center of your headboard then mark it. Then using that as a guide, mark the left and right side. From that mark on the wall, decide how far out you want the ceiling bracket and mark it on both sides. Ours are about 8" out from the wall.
Step 6. Following the instructions on the EZ Anchor ceiling drills, install the first and second ceiling bracket. At this point, Joe and I slid the frame in to make sure it fit and then removed it before adding the other brackets.
Step 7 and 8: Once all the brackets are added, slide in one side of the frame, then the front, then the other side and add the connectors. The connectors slide on and off and can be tightened in place. Make sure to place the rings where you want them though because they can't slide past the ceiling brackets. The frame doesn't come apart easily once it's installed so make sure you're comfortable with where they are.
Add your drapes to your rings and you're done! It sounds harder than it was!
About the DIY Panels
I won't share a detailed tutorial here because I'm no pro but in short, I calculated how long they'd need to be and used a sheet to test it out before making one. Once I made one panel, I did the same- tested it out to see if my measurements were correct. They were barely long enough so I added a couple of inches to the other panels. I sewed curtain tape to the top of each panel and slid the drapery hooks into them. There are a few variations here. You could also use no-sew hem tape and rings with clips if you don't sew.


.jpg)


11 comments
Wow! This is just beautiful! Very creative.
ReplyDeleteThank you!
DeleteExcellent job! Turned out lovely!!
ReplyDeleteThank you!
DeleteHi Tiffany, could you tell me what spray paint you used? The link for spray paint is wrong. Thanks 😊
ReplyDeleteHere you go! https://rstyle.me/+i_OGjgUDLZpX-MA5fghlQA
DeleteLove it!! I can’t wait to try it out, great job 😍
ReplyDeletethank you!
Deletewhat size bed was this made for? I am trying to figure out pcp piping purchase for a queen bed/ bed frame
ReplyDeletea full size bed
DeleteThis is very beautiful! Great job! Thank you for the detailed description and how to do instructions and information!
ReplyDelete