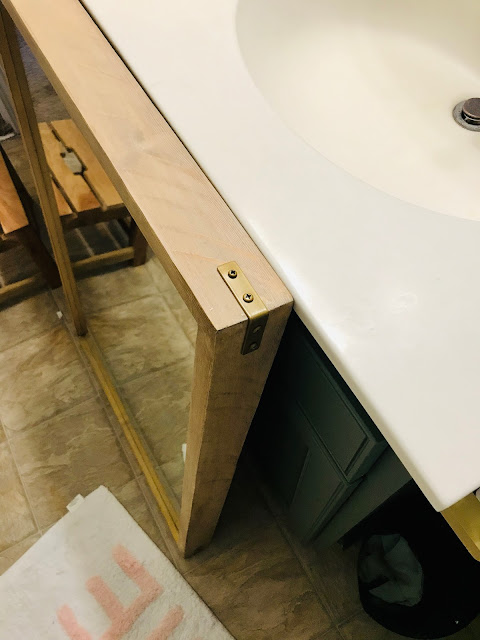
You guys! I'm calling the bathroom complete. I can't wait to share it with you- it was a labor of love and learning. If you've ever tried to find inspiration for a 5x8 basic bathroom that doesn't include big expenses like new faucets, new flooring, tilework, etc, you know it sort of doesn't exist. But I'm a big fan of the phase 1 makeover and since the kids' bathroom is the one overnight guests use, I was motivated to give it a facelift on a budget. Read about our budget-friendly basic bathroom makeover-- why we made the choices we did, and ideas to improve your own bathroom.
 |
| original finish |
first, sand the wood and get rid of any remaining dust. I saw the difference clearly between sanding and not sanding since I forgot to sand for tests 1 and 2. Cant you tell?!
second, make sure to use a wood conditioner. It really helps and pine needs all the help it can get. Okay, here are the combos I tested and the products I used*:
Sanding block
Wood conditioner
Early American Stain
Golden Oak Stain
Whitewash Pickling Stain
Weathered Oak Stain
Sander
*Most of my supplies were from Home Depot except the whitewash stain- got that from Amazon!
Here are are the stains I tried on the pine "test" piece:
1. weathered oak
2. golden oak, and then the next day, whitewash pickling stain that I wiped off after a minute.
3. weathered oak + early American wiped off right away.
4. weathered oak + early American allowed to sit for a couple of minutes before wiping off.
5. weathered oak (heavy-handed) + early American allowed to sit for 5 minutes before wiping off.
6. golden oak allowed to sit for 2 minutes.
7. golden oak lightly applied + whitewash pickling allowed to sit for just a minute before wiping off.
and then on a whim:
8. early American + the whitewash pickling stain. (not pictured but trust me when I say it looked disgusting).
It might seem like overkill to test all of these but unless you have experience staining, I'd suggest you do the same! How the final piece will look can vary based on how much stain you use, the wood prep, how long you allow the stain to sit on the wood, etc. So it's best to figure out your plan on a piece of test wood. But understand each piece of wood is different and so your results will be slightly different from your test. Also, I know they all look very similar here but in person, the differences are more noticeable. And really this 'test' is only comprised of a few variations I knew I'd like.
My favorite was #5 and #7. I couldn't decide so I asked Joe, who voted for #7. I was so afraid of using the whitewash for some reason but I figured the worse that could happen is that I wouldn't like it. And guess what? I already didn't like the mirrors so did I really have anything to lose? DIY takes courage y'all!
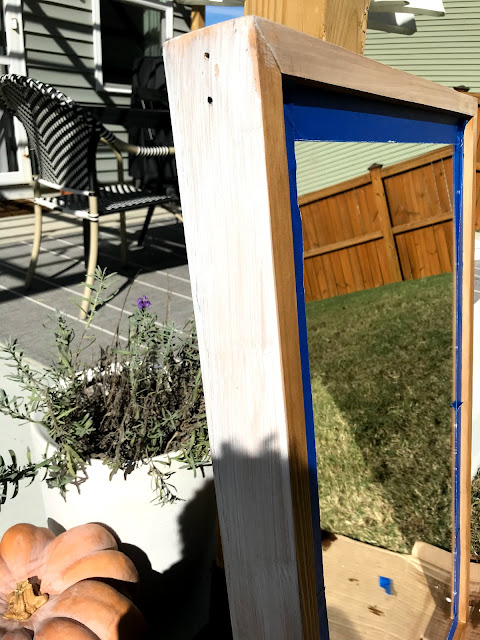
Ok so before staining the mirrors, I sanded off their waxed pine finish. I used an older version of this sander. The wood sanded really nicely- smooth and uniform. It was time to stain!
Here's what I did to attain its new "oak-like" finish:
2. Next, I applied golden oak lightly, meaning I dipped my cloth (I used an old t-shirt) into the stain and wiped it over the wood, rubbing it in as I went so as not to let it "puddle" anywhere. I let it dry for a few minutes. I was working outside in the sun so it didn't take too long for it to be dry to the touch.
3. Then, using a foam brush, I applied the white wash pickling stain. I used a little more whitewash to cover the area. I allowed that to sit for just 45 seconds. I learned that if I let it sit too long it became hard to wipe off after. Remember, you can always do another coat but you can't go backward. So start light-handed! After less than a minute, I wiped it up (in?) with a cloth. I worked on one section at a time so the whitewash pickling stain wouldn't run or dry too quickly. In fact when I tried to work on one section while the other dried, the stain ended up drying too quickly! So take your time.
And the result:
And as with any DIY project, make sure to start in the most inconspicuous place you can! That way you can get the hang of it in an area that's not very obvious. For this project, that was the very top where no one can see. Starting there gave me a chance to get in a groove.
The mirrors are not perfect but are SUCH an improvement from where we started! I hope these tips for staining pine to look more like oak were helpful! And side note, if you're looking for pretty wood mirrors, these wood-look mirrors are awesome! I was so tempted to keep them!
*affiliate links included. Thanks for supporting Pretty Real Blog. ♥
Nadia is 8! What?! Just in case you missed it, I went through ALL her party themes in my stories this month and it was such a fun walk down memory lane! It's saved in my highlights; I'll wait if you want to go check it out. ;) This year, we were back on the character train (not my favorite but hey, it's her birthday not mine) and I have to say- if it has to be a character, at least it's a cute one. These dolls are adorable and my girls are obsessed with them. When she asked for an LOL Dolls Birthday Party, I knew the challenge would be not buying all the things. I think I did ok! I found the sweet spot of simple character-less items with a few fun LOL Doll faces peppered in. Here are all the LOL party ideas and details and where you can find everything I used!
I mean, it's only been 6 months. I figure I owe you an update! I shared our initial plans for our bathroom here. Then between the busy-ness of life and wasting lots of time searching for flooring that we later decided to skip (and a few other setbacks I'll share below), months had passed! Don't do what I did! Read on to find out what not to do when renovating your bathroom on a budget + a look at our plans now.
First up, this amazing Studio McGee bed!
I'm so excited to share our Patio Makeover with you! It's been a looong time coming! Last year we had a fence built. While that wasn't exactly a "fun" purchase, it created the privacy we needed before investing in a complete patio makeover. We wanted an outdoor spot that could accommodate our big family and reflect our style. We had a lot of issues to work around- very close neighbors/lack of privacy (welcome to suburbia), a slope-y yard, a huge swing set, and bright and harsh sun. Here's how we tackled the issues, infused our style without breaking the bank, and our future plans for the space.
This shop has been compensated by Collective Bias, Inc. and its advertiser. All opinions are mine alone. #CollectiveBias #AmericasBestToyShop #TheLionKing

You guys. I have always been obsessed with Disney's The Lion King. When I was young I could quote every line (and still do!). When I had children, it was the very first Disney DVD I bought. Despite the fact that Genevieve could barely sit through a 20-minute kid show, let alone an entire movie, still, I tried. My excitement the first time I saw the preview for Disney's The Lion King coming to theaters July 19th was off the charts. Literal butterflies! There's something about passing on an experience you were passionate about as a child to your own kids that feels so precious. I couldn't pass up the opportunity to tell you guys about The Lion King events at Walmart and adorable The Lion King products there. Keep reading for a peek at these new toys plus my very own The Lion King Trail Mix recipe!
You guys know I love a good dupe! I've been compiling these looks for less for you- there are some gems! I've got Restoration Hardware Style for less, an Eames dupe, World Market Global style for a 1/4 of the price, a great Rejuvenation look for less, and several Room and Board Look-for-Less styles!
This shop has been compensated by Collective Bias, Inc. and its advertiser. All opinions are mine alone. #CollectiveBias #FDNewBeauty
Thank you First Alert for sponsoring this post. Help protect your home and family with voice and location alarms from First Alert!
Let me tell you a cautionary tale. Once upon a time, my husband was out of town when the battery in our alarm needed to be changed. It was 3 o'clock in the morning. In my sleepy stupor, I couldn't find 9V batteries that worked (WHY DOES JOE MIX OLD AND NEW BATTERIES?!). Picture me, rummaging through random drawers in the garage trying to find a working battery at 3:00 am, and then, still half asleep, trying to figure out which of the 4 alarms upstairs was chirping because of course one beep sounds like it's coming from every alarm. Well, I avoided a Pheobe moment (Major bonus points if you get that reference!) and figured it out eventually, but when I got an opportunity to upgrade to an alarm with a sealed battery that lasts 10 years AND one with voice and location technology, I was intrigued.
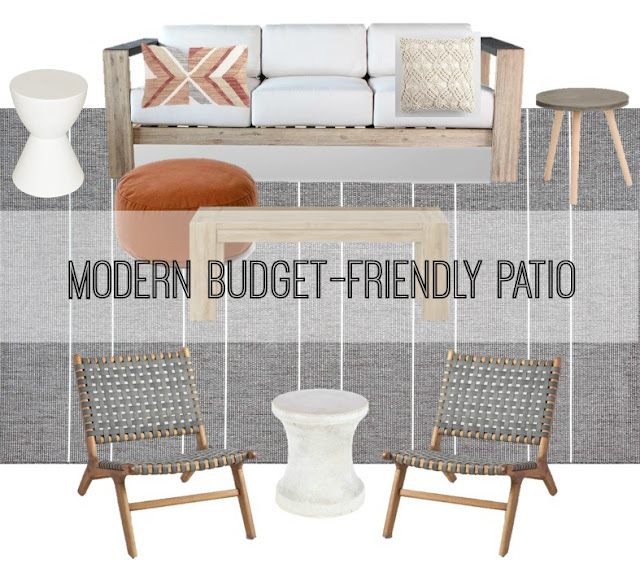
If you follow on Instagram, you know I've been obsessing over the patio for like ever. I missed posting last week (we were at the beach! yay!) and will probably miss next week (we'll be on our first kid-free-out-of-the-country vacation to celebrate 15 YEARS of marriage) so I wanted to pop in and share our patio plans now that it's starting to get real! Keep reading for budget-friendly patio inspo!
For a while, I've wanted to put all our paint colors in one place. You guys know I love a good trend, but I wanted to keep our home's colors cohesive after our old house, which Joe called "the fun house" because of my crazy paint color choices. We had a red office/guest room, a lime green kitchen, and an aqua bathroom. And I was threatening to put orange somewhere (Lord, help me). I went in the opposite direction here with neutral paint colors and punches of boldness (hello master!). I thought it would be fun to share our paint color choices with you along with which colors we love and which we regret. (#oops). I'll also share my #1 paint tip and my thoughts on color matching. Here goes:
We took our very first family trip--my first trip ever!-- to Walt Disney World almost a year ago and I've been meaning to tell you about it! I will share what we learned and what we'd do again (or differently) in another post but for now, I wanted to share what we wore. Don't judge me- it's a bit less work, or at least I thought it'd be. I got a bit carried away. ha. I never thought I'd be one to dress my kids in Disney attire ever. For any reason. haha. I mean, even throwing this party was a test of my love for Genevieve. No shade to those who love character stuff but I've never been that mom.
The girls' room isn't finished but I'm calling new headboards, bedding, a dresser, and a nightstand the conclusion to phase 1. You might remember it looking like this. While it was cute, turns out it was a bit too busy for us. I'll share more about that in a separate post but for now, I wanted to share where things stand- particularly for those of you who were mesmerized by the painting woes from my Instagram stories. 😂
That's not a great title for SEO, but hey, it perfectly describes my goal. This could also be titled "Never buy a home with a corner fireplace in an open concept layout." Between its weird layout (total open concept, a corner fireplace, a pass-through, and a large window) and figuring out my style (hint: it's not farmhouse), the living room has changed many times! I'm challenging myself to let it breathe and not buy any major furniture pieces for a while. But the blank wall I shared over on Instagram bugs me like crazy. The mantel felt so empty after Christmas and the whole scene lacks personality in a major way. Here's how I plan to give it some personality:
I've talked about money before. Though it's been a while, you're no stranger to real-life talk around here. This year I'd like to share more life, in addition to parties and home decor. The first topic on the docket: the first step to becoming debt free.
I should clarify that we are not truly debt free- we have a mortgage. However, we have zero consumer debt, school loan debt, car note debt, etc. And it feels good. We had 50K in school loans (YIKES) and paid mine off after taking Dave Ramsey's Financial Peace. But we slowed down when I quit my job (and then had a 2nd baby and then had a 3rd and then sent the first two babies to private school...). But now we're on track and I'm sharing my struggles (they're real) and some tips if you're on a similar journey. The first step to becoming debt-free was to stop overspending. Duh right?! I'm going to be vulnerable here so let's just declare this a judgment-free zone mkay?
September through Christmas is crazy over here (Back to school, 5 birthdays, Thanksgiving, and Christmas) so forgive this January post on Nadia's September birthday party. It sort of pained me to keep a Unicorn party simple because it was on my list of themes (yes I have a list!) long before it was all over Pinterest. But with only a few guests and a week of planning, I did it. Yay me. haha. Ok so here are a few pictures of her cute and simple Unicorn party. And I've shared sources/supplies at the bottom of the post!
budget decorating


